
Rethinking 19” Rack Mount Design
The 19” rack mount is an industry-standard format, typically featuring a sturdy sheet-metal enclosure, a front panel with a range of controls and indicators, and a rear panel for power and other connectivity. This timeless design allows equipment to be mounted in fixed or mobile rack units via mounting ears, providing a high level of protection for internal components and enabling flexible, hidden rear cabling.
While most existing designs prioritise a utilitarian approach, when approached with a new project and a fresh canvas: how can we introduce a new and interesting design perspective to the 19” rack mount format?

A recent 2026 project by Engineering Lab for Gall Analytical, combining user-driven design with a clean, modern aesthetic for scientific instrumentation.
Completed in 2025 for the British company Finchetto, this project helped break speed records and win industry awards during prototype testing.
Driving Design by Requirement
When starting the design of a rack mount enclosure, the internal components, form factor requirements and, to some extent, the controls are often already defined, along with the limitations of the 19” rack mount footprint. This typically allows for 440 to 445 mm of usable internal width and up to 400 mm of internal depth, providing a solid basis from which to begin arranging components and mocking up the final layout.
A defined set of components must fit within the unit, allowing the overall height to be determined by the tallest component and the airflow required around it. Rack mount equipment is measured in rack units, with 1U equal to 44.45 mm.
Common sizes include:
1U: 44.45 mm
2U: 88.9 mm
3U: 133.35 mm
4U: 177.8 mm
Connectivity is another key factor that drives the design, both internally and externally. It is necessary to determine the location of external ports, the type and position of the power intake, the placement of fans and ventilation grilles, and how internal cabling can be routed to support internal connections.
Finally, an array of user controls must be integrated into the front panel. These controls are typically flexible and connected via cables, although they may also be surface mounted. In such cases, they must be positioned accurately, with corresponding apertures incorporated into the design, to ensure reliable operation from the exterior.
It is crucial to establish the internal layout of the unit before continuing with the design process.
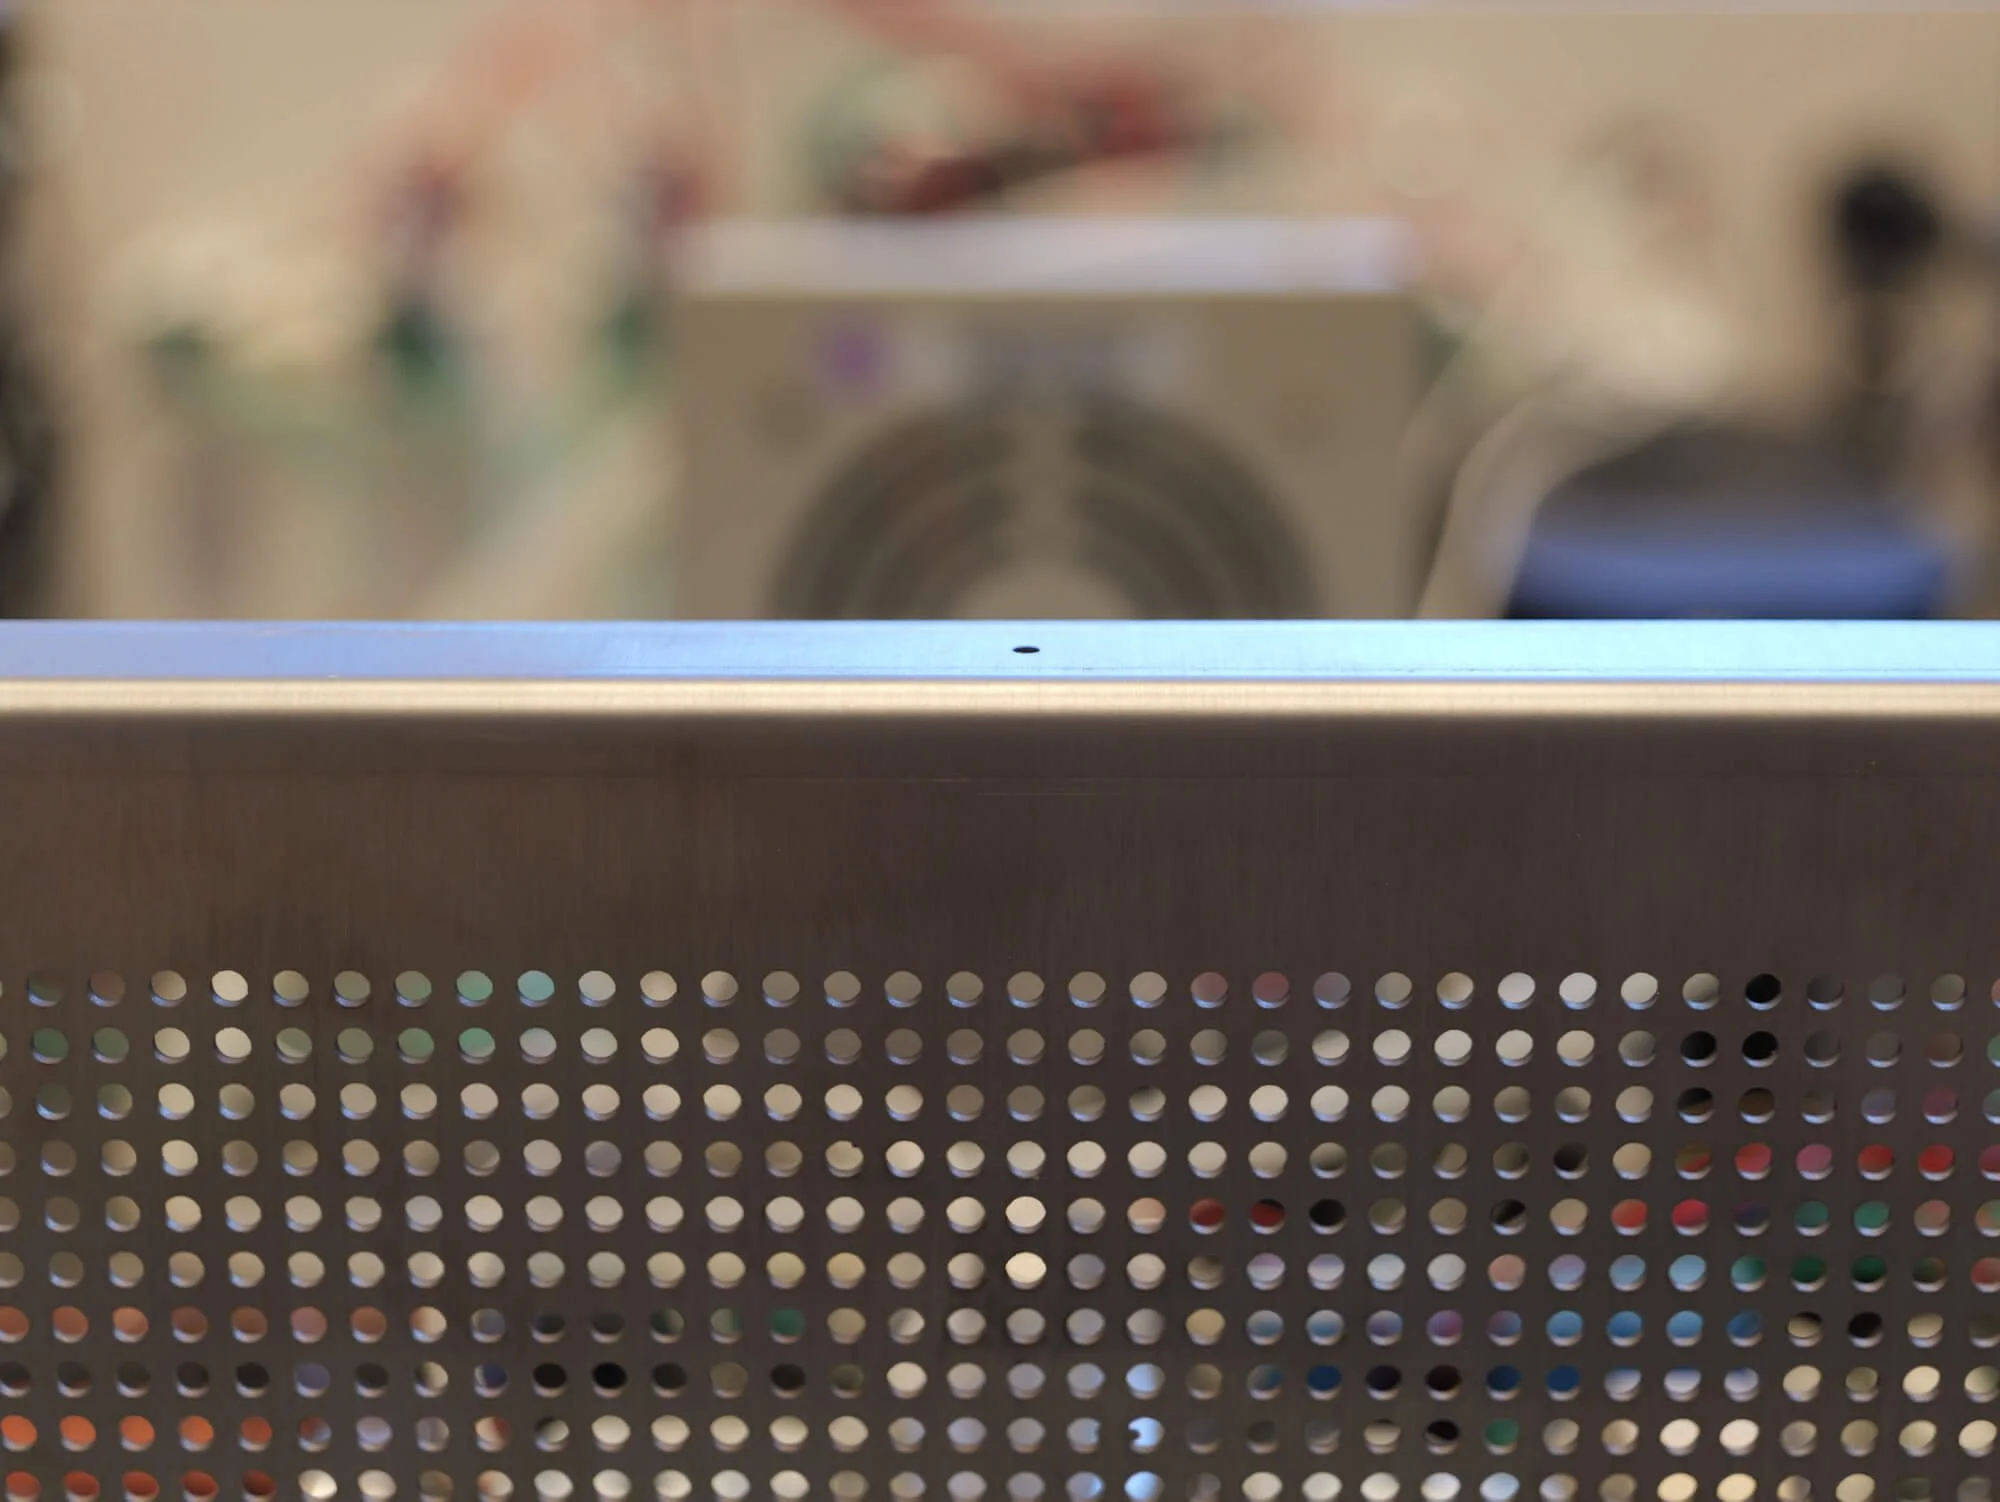
Circular stainless steel side venting holes are cut for fan placement, tapped holes along the top surface will secure the unit’s top cover.

Custom holes were machined into the front faceplate to allow connectors and an SLA printed light guide to be mounted across the front of the panel.
Material Choices
Typically, 19” rack mount units are constructed from sheet steel. In many cases, choosing stainless steel sheet offers enhanced durability and corrosion resistance, making it a premium material option. Stainless steel is considerably harder to machine than standard sheet steel, but can be machined to order.
For front panels, a CNC-machined aluminium faceplate is our preferred option; finished with powder coating to achieve a high-quality, durable surface with improved wear and corrosion resistance. This method also allows for precise cut-outs for controls, connectors, and indicators, resulting in a clean and refined finish.
Finalising material choices early in the design process is critical. It allows for a clear understanding of mechanical properties, weight, and material limitations, which directly informs decisions around wall thicknesses, mounting strategies, fastening methods, and overall structural integrity. Designing within these constraints ensures that prototypes not only function reliably but also have a premium feel and long-term durability.

The finished front plate after being returned from powder coating and custom decal painting.
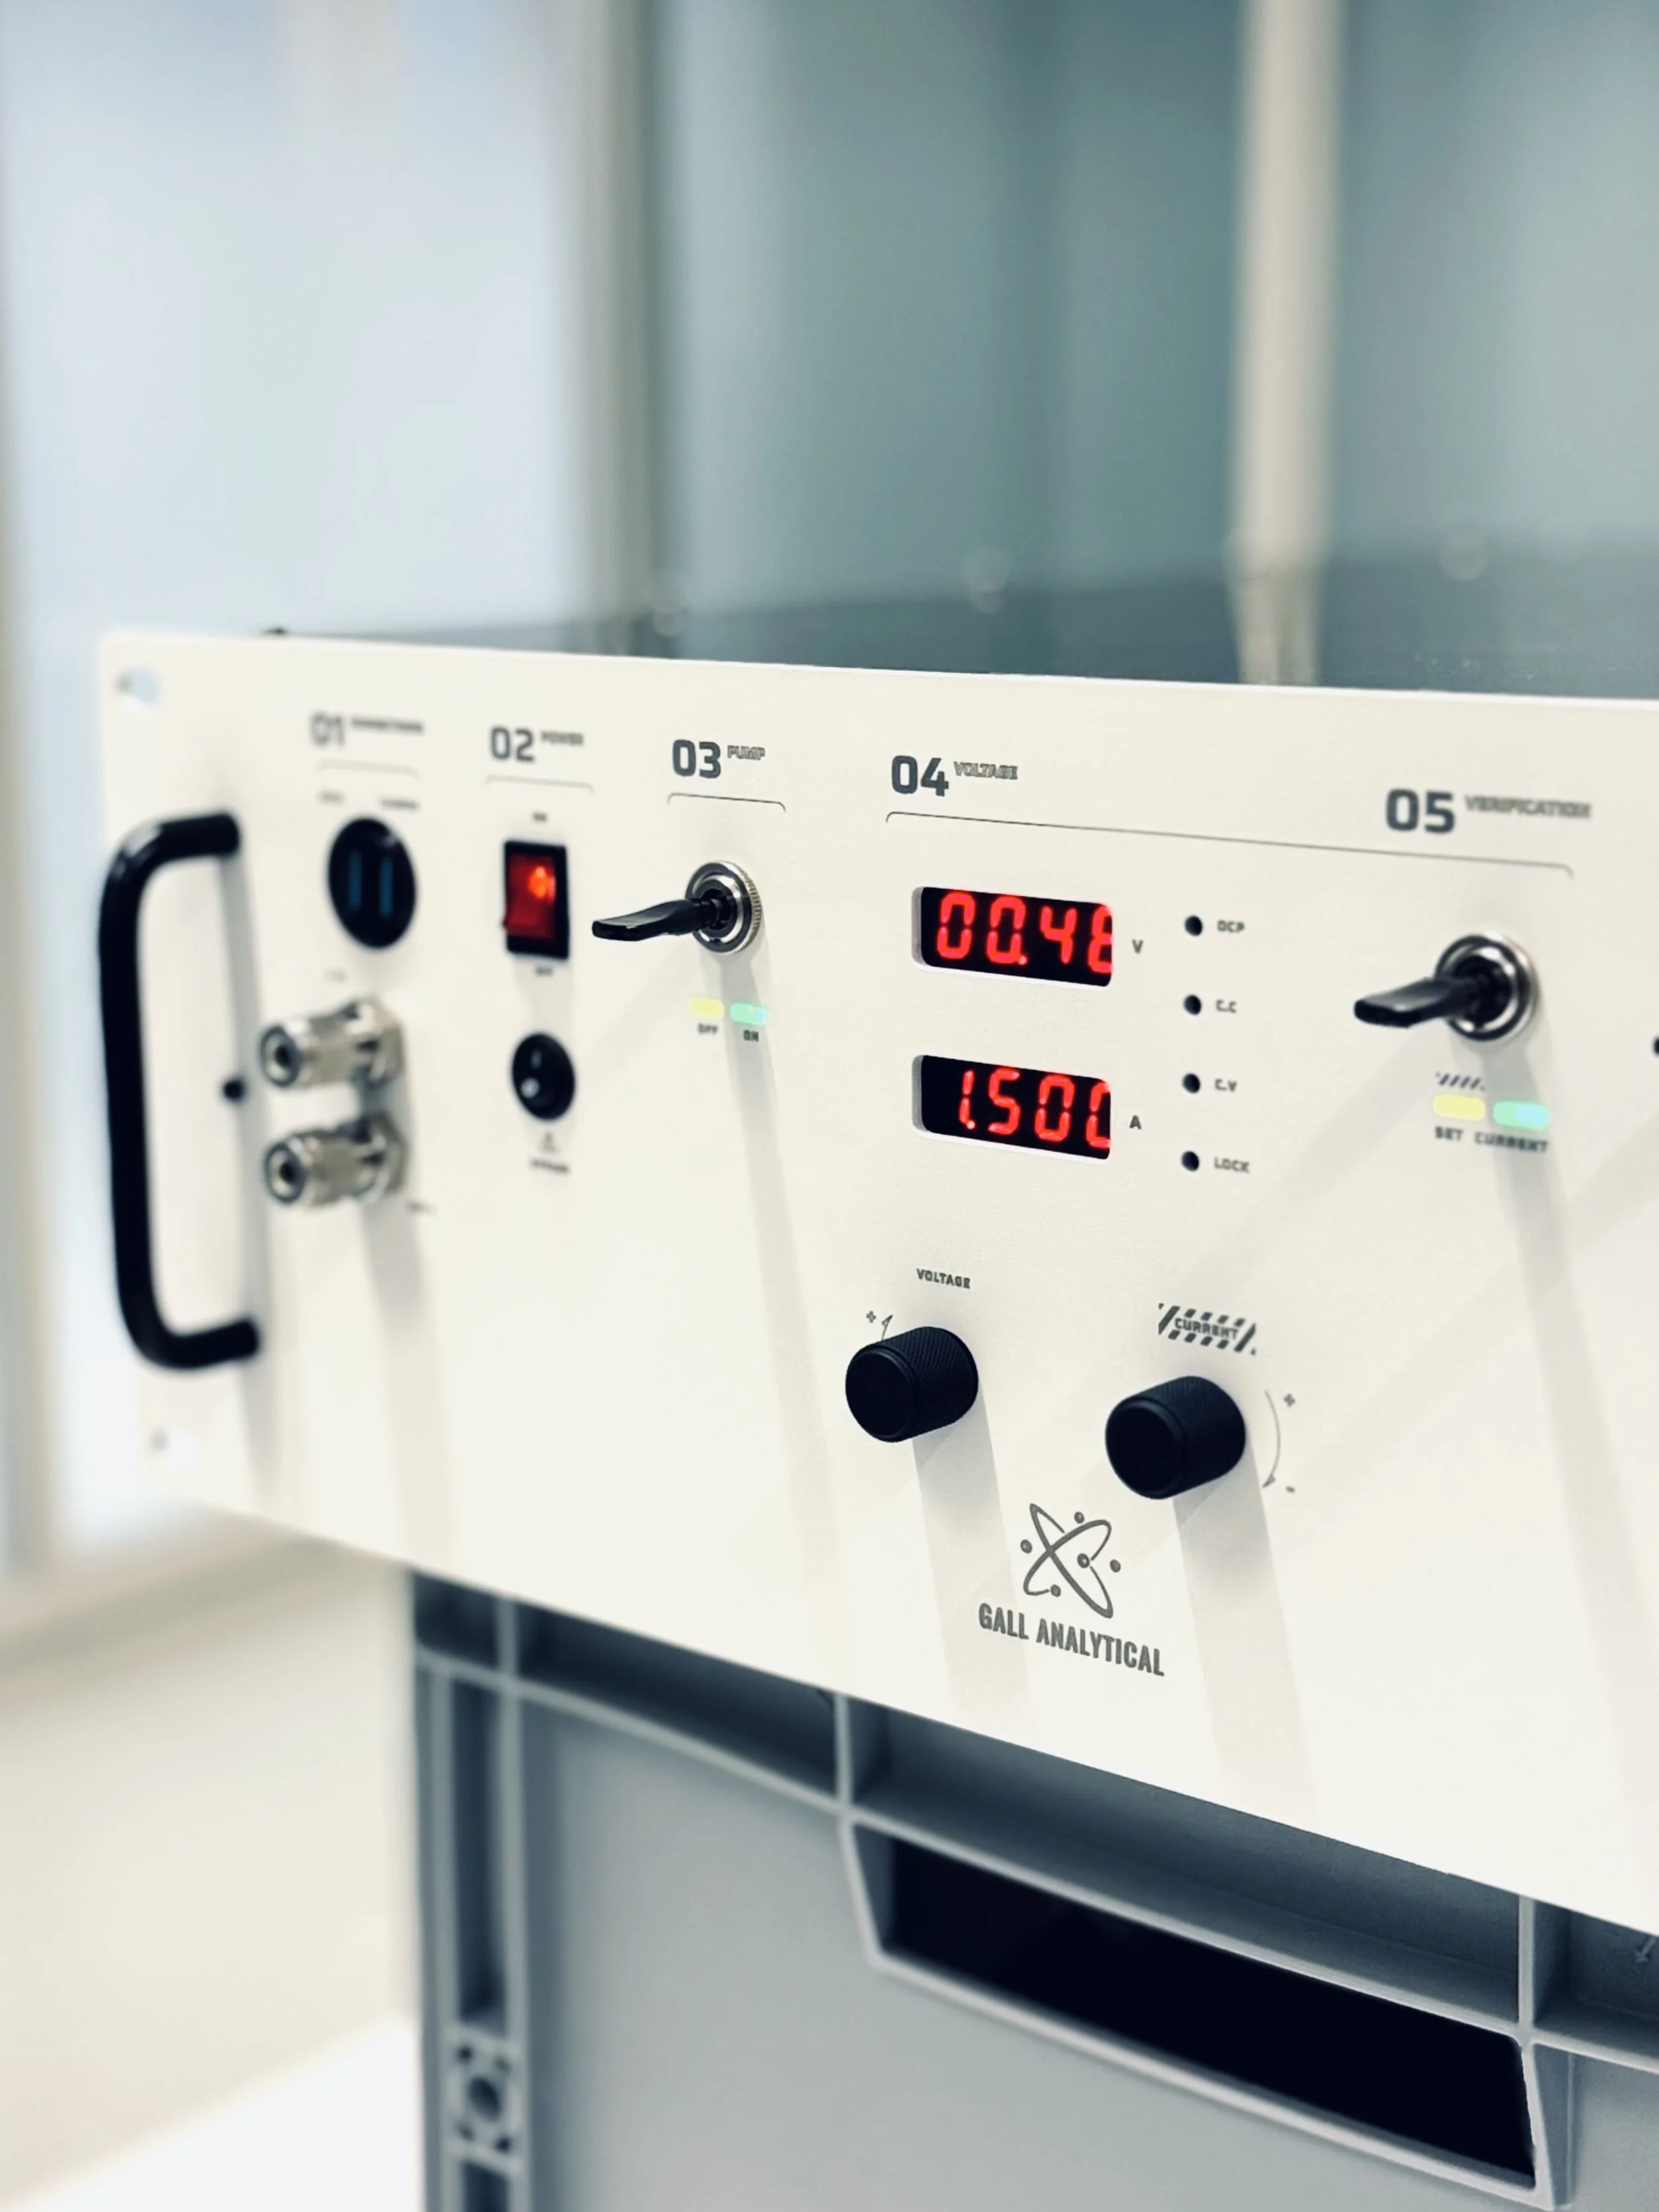
With the custom dials, switches and connectors installed, the decals clearly indicate how to operate the unit.
Completing the Design
When designing sheet steel enclosures, several considerations must be factored in:
Sheet thickness: too thick and the unit becomes unnecessarily heavy; too thin and the structure could be compromised.
Bends and cutouts: these must allow for smooth rolls without corner creasing.
Mounting holes: deciding whether they should be through-hole or threaded.
Edge design: for attaching the top sheet to the lower unit and securing the front panel to the main enclosure.
Surface finish: powder coating, paint, or brushed finish, affecting both aesthetics and durability.
Tolerance and fit: ensuring panels align correctly without gaps or interference.
Ventilation: placement of slots, perforations, or cutouts to maintain airflow around components.
Assembly method: screws, rivets, or welding, which impacts durability, serviceability, and production.
Weight distribution: critical for rack-mounted units to avoid stressing the rails.
When designing the front faceplate, similar design decisions are necessary:
Aluminium thickness: determining the appropriate depth for milling and durability.
Type of controls: selecting how parameters will be physically adjusted, whether via potentiometers, momentary switches, buttons, or other options.
Control placement and usability: ensuring an intuitive user experience, with logical spacing and ease of operation.
Indicator placement: positioning indicators close to the corresponding controls for immediate clarity.
Engraving, stickers or custom painted text: ensuring text and graphics are clear and legible.
Mounting depth for controls: leaving sufficient space behind the panel for components and cabling without interference.
Cable routing: planning internal wiring to front-panel controls with proper strain relief and serviceability.
Consistency and modularity: considering standardised spacing and mounting patterns for future units.
Additionally, general design integration must consider:
Thermal management: ensuring heat from internal components does not compromise performance or material integrity.
EMI shielding: if relevant, ensuring material choices and panel design support electrical interference protection.
By carefully considering these factors, we can ensure the final unit is robust, functional and user friendly, while remaining practical to manufacture and assemble.
By incorporating elegant modern design with the functional durability of the 19” rack mount system a truly unique piece of hardware has been created and the unit is ready to be installed.
Finished Units
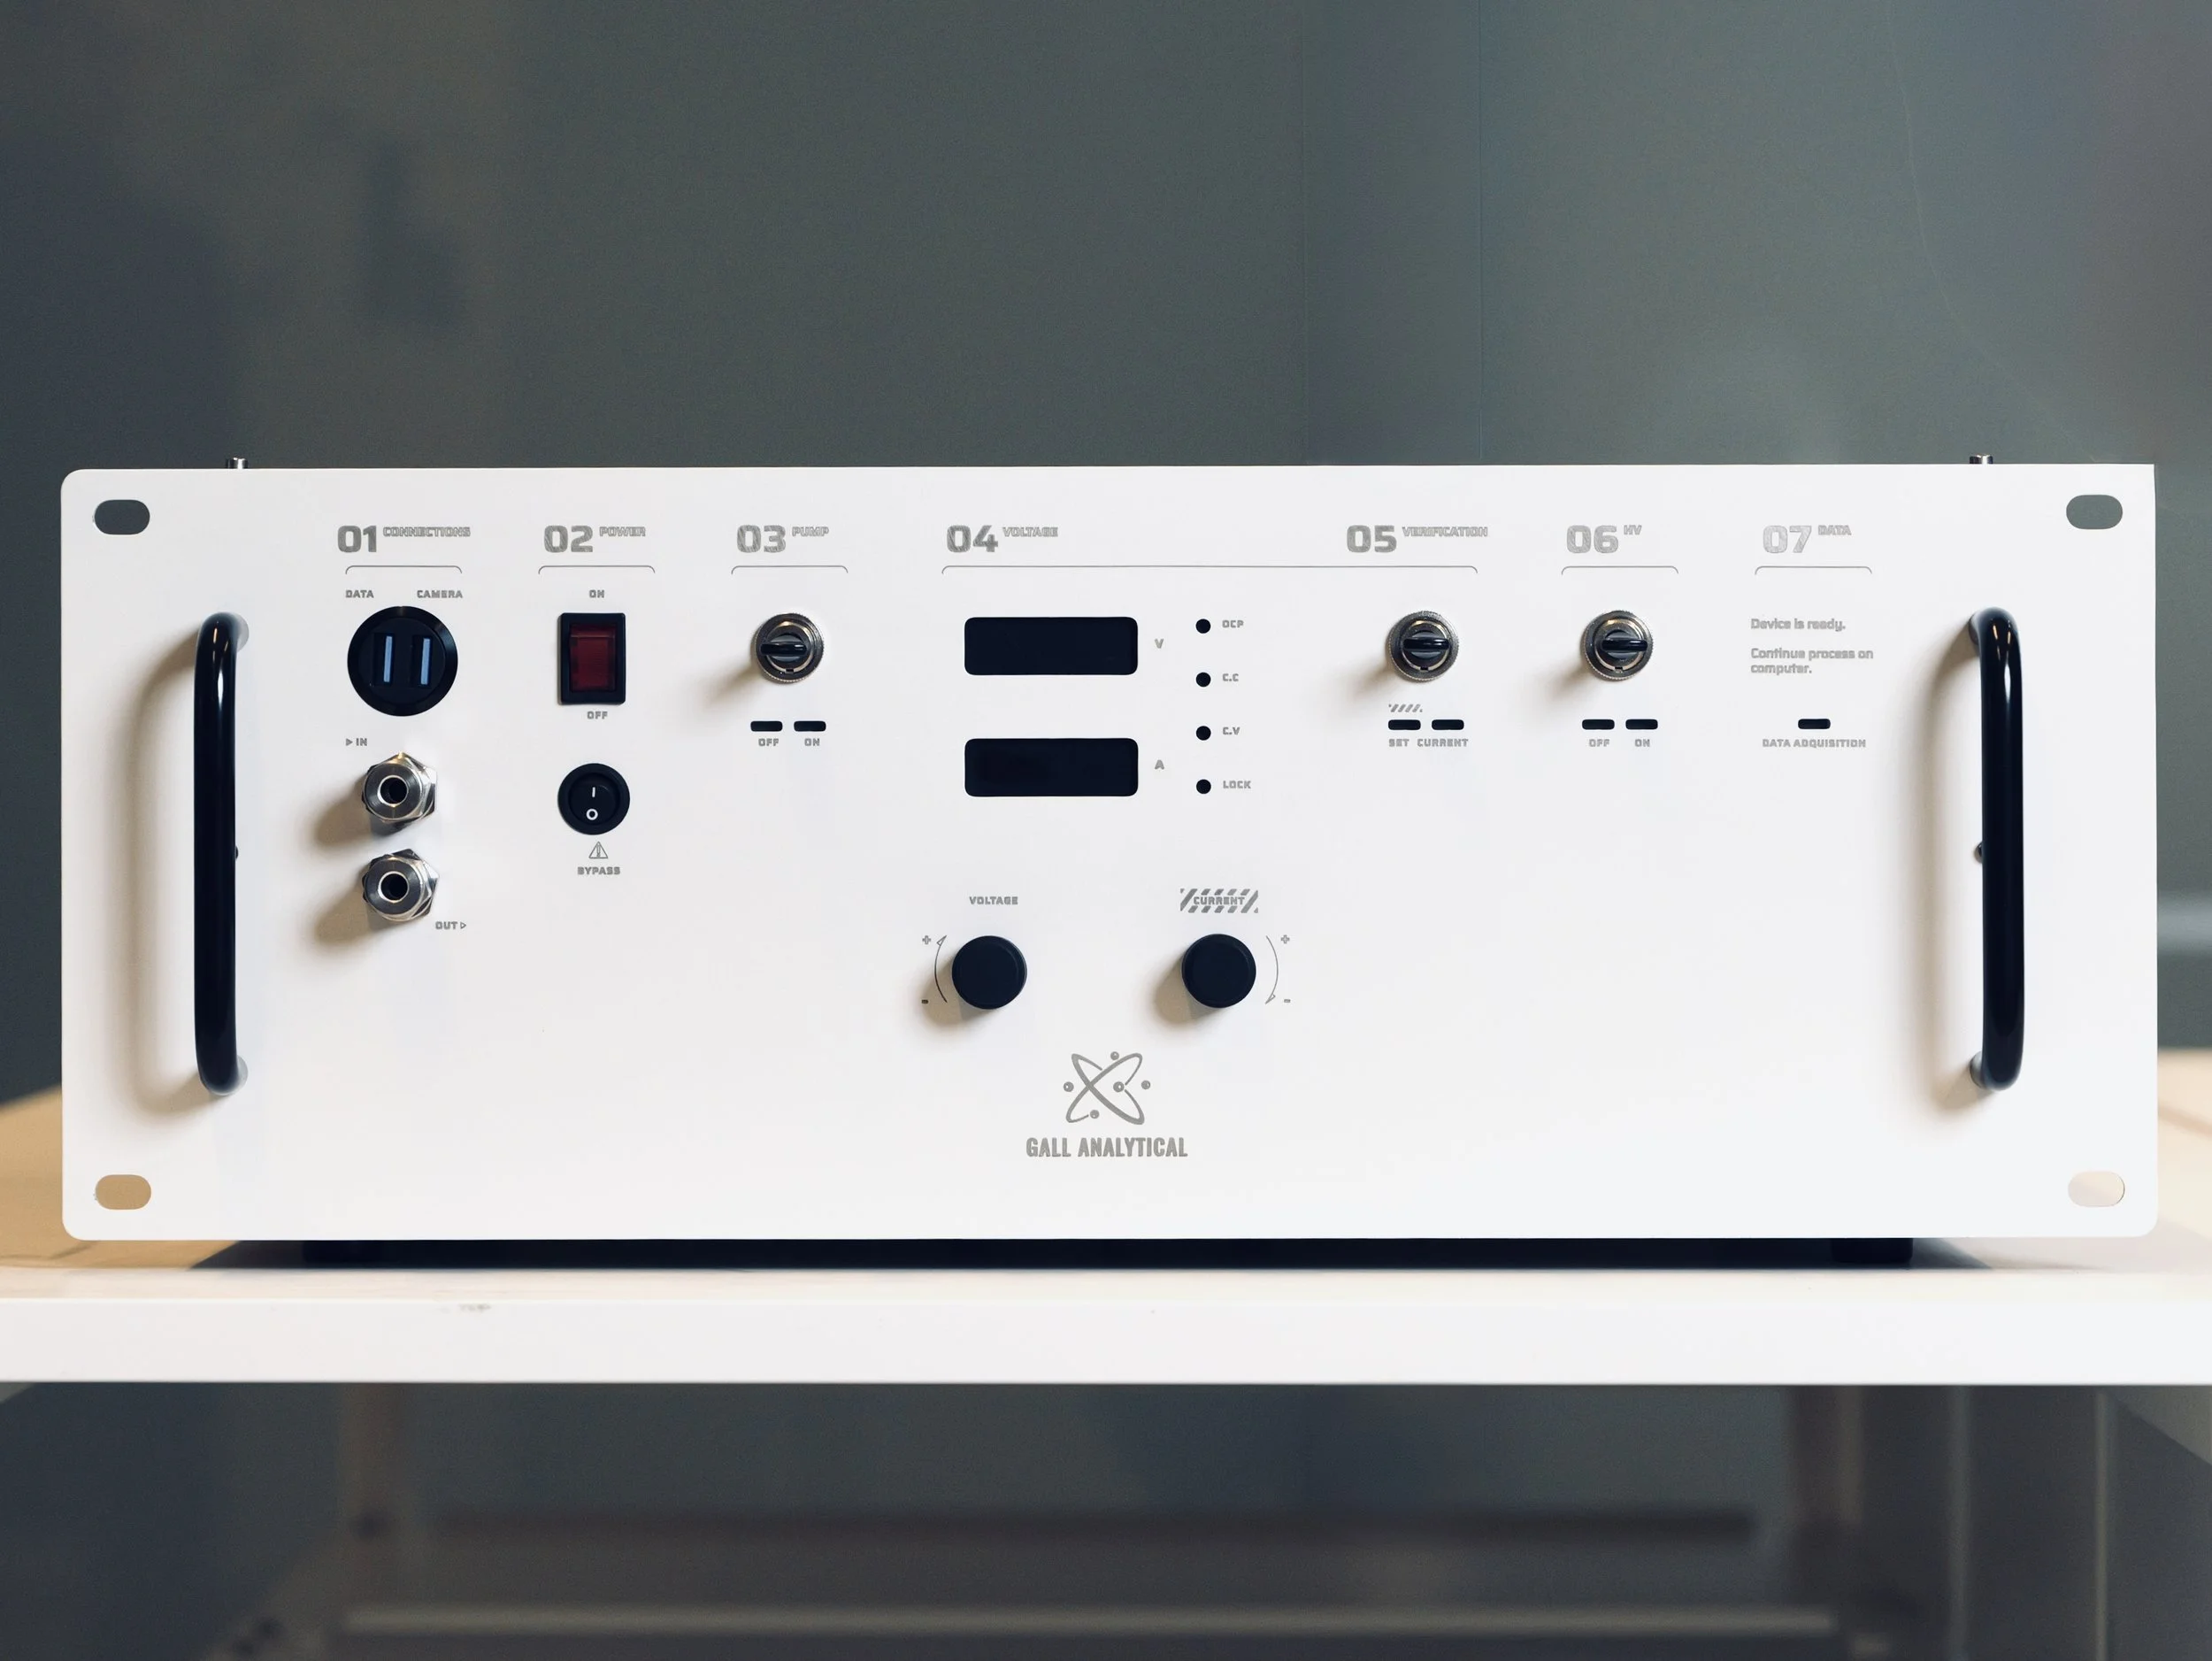
Once the sheet steel enclosure and aluminium faceplate are delivered from the suppliers, the first step is to inspect all surfaces and edges for accuracy, fit, and finish. Any deviations from the specified dimensions or imperfections must be addressed before proceeding. The aluminium faceplate has already been powder coated and is then prepared for the application of the custom painted decals. These decals not only provide functional labelling but also contribute to the overall aesthetic, giving the unit a polished, professional and highly durable finish.
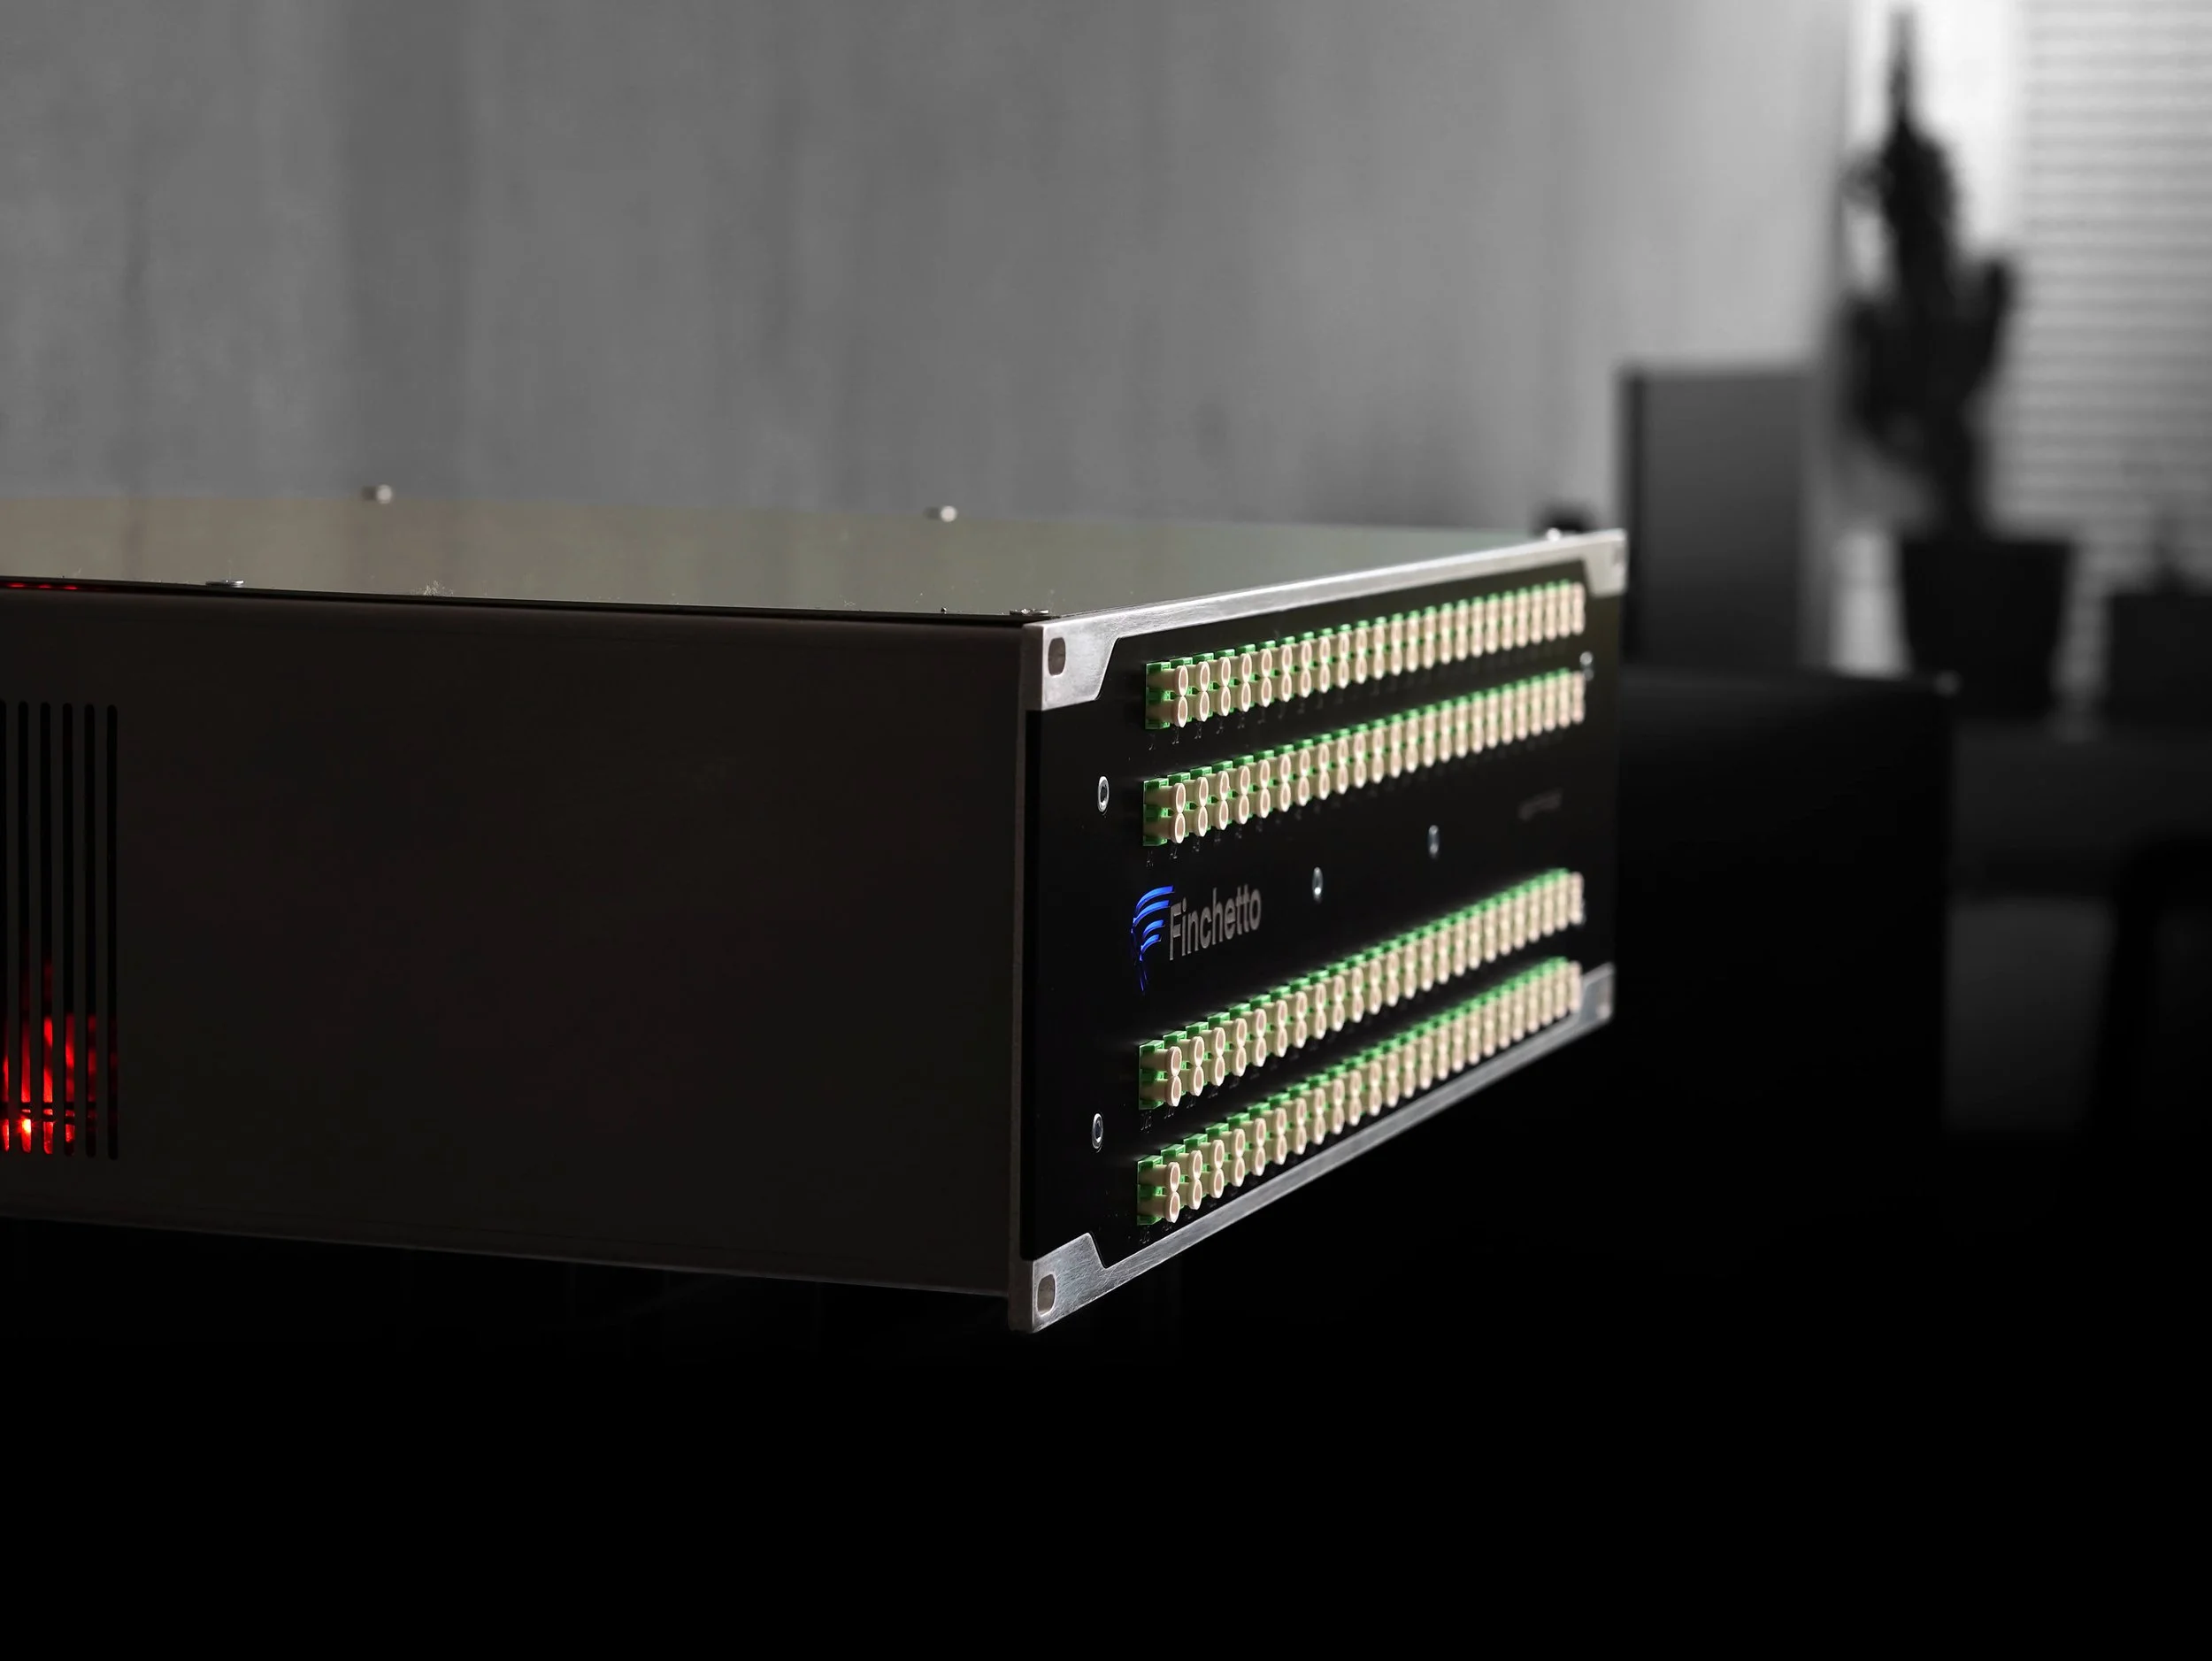
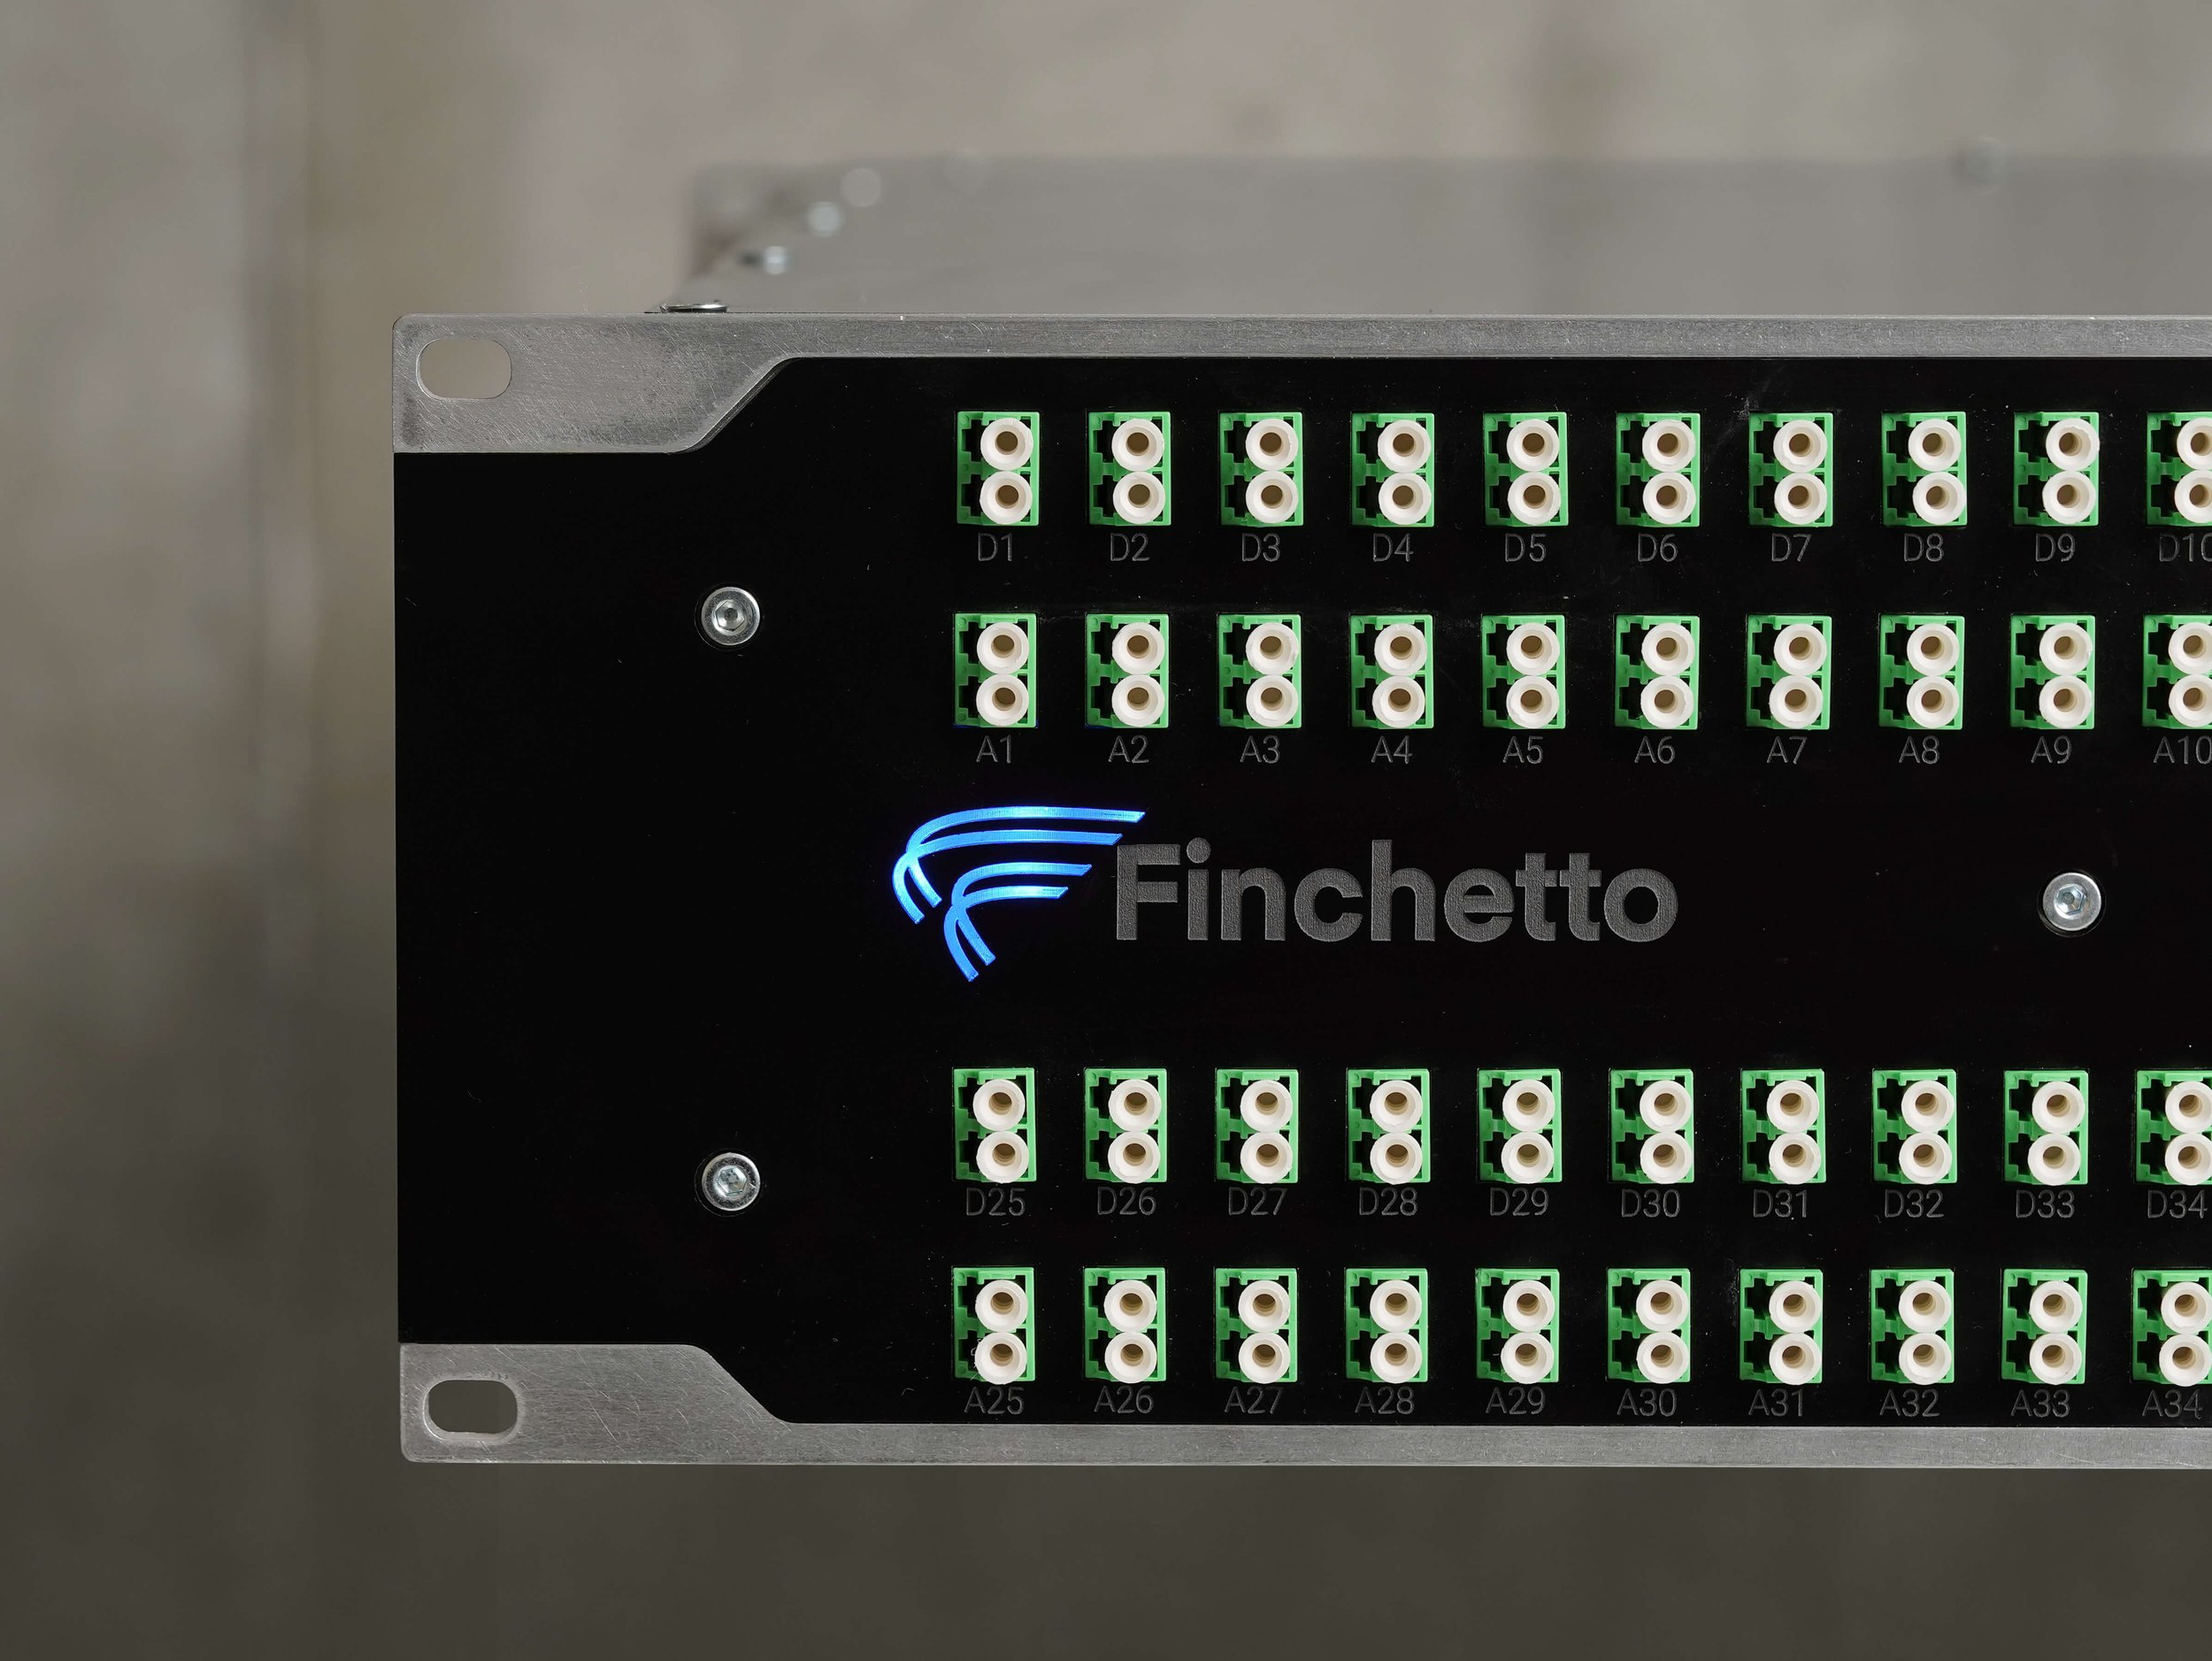
Fully assembled, the Finchetto unit combines all the durability of a 19” rack mount enclosure with sleek, illuminated blue logos, ventilated power unit grills, and well-laid-out connectivity. Functional and elegant, it is a piece of hardware designed for ease of use and ready to perform.
Final Thoughts
Every decision, from sheet thickness and bend placement to control layout and decal positioning, feeds directly into both functionality and the user experience. Attention to these details ensures the unit performs as intended and is fully fit for purpose. It is through this careful process that we find the balance between technical requirements, manufacturing constraints, and the premium finish we aim to achieve.
Ultimately, a well-considered design is one in which the materials, internal components, and user interface work in harmony, creating a product that is both practical to use and satisfying to engage with.
If you are looking for a custom 19” rack mount case, or something similar; we can manage the entire process. From initial layout and material selection to custom electronics, finished sheet steel enclosures, and bespoke faceplates. Every step of our design process incorporates functionality, durability, and usability, so you can be confident the final product is not only visually exciting but also built for the task at hand and a joy to use.