
Turning Light Into Design: How We Prototype Light Pipes at Engineering Lab
At Engineering Lab, we believe product design should be beautiful, functional, and above all—buildable. Whether we’re designing enclosures, interactive interfaces, or fine tuning how a single LED glows through a piece of resin, we pay attention to every detail.
One of our favourite prototyping challenges? Light pipes.
These transparent components do the crucial job of channeling light from internal LEDs to the exterior of a product. You’ll find them everywhere, from blinking indicators on routers to glowing buttons on industrial controls. But designing them to look good, perform reliably, and be manufacturable? That takes work.
We’ve spent a lot of time developing light pipes that not only function as intended, but also match the visual and mechanical design of our products. And we do it all in-house, using our Uniformation GK2 SLA printer and clear resin to move fast and test often.
Here’s a look into how we prototype light pipes and why our workflow saves us time, money, and a lot of sanding.

A look inside the resin 3D printer just after printing, with the part still fixed to the build plate. This stage captures the raw output of high-precision optical component fabrication before cleanup begins.

Precision resin 3D printing in action; this freshly printed light pipe ring with supports still intact. Ideal for optical prototyping and low-volume production.
Why Light Pipes Matter in Product Design
A light pipe is a transparent rod or shape—usually plastic—that guides light from a small source (like an LED on a PCB) to a visible surface on the product’s exterior. They’re vital for clean, professional visual cues. But there are challenges:
The light must travel efficiently with minimal loss.
The geometry must fit within tight enclosures.
The materials need to be polished and clear to avoid scattering.
When you’re dealing with limited space and specific optical requirements, designing an effective light pipe means prototyping repeatedly—and learning fast from each iteration.

This image shows the first prototype of the resin-printed light guide placed onto the PCB LEDs
Our Prototyping Workflow for Light Pipes
Design in CAD
Everything starts in CAD, where we experiment with light pipe shapes, bends, surface angles, and entry/exit faces. We often batch multiple designs in a single build to compare different geometries side-by-side.
Prepare for Print
We import our files into the GK2 slicer software, orient for optimal clarity and light transmission, and add supports carefully to avoid scarring optical surfaces.
Print with Clear Resin
We print at high resolution (50 microns or finer), using Uniformation Clear Resin, which gives us excellent base transparency.
Post-Process for Clarity
After printing, we wash the parts in IPA and remove supports. Then comes the important bit: sanding and polishing.
We start with 400-800 grit sandpaper on a flexible surface (usually cork) and progress up to 2000 grit.
Final polish is done using acrylic cleaner or a plastic polish, to restore optical clarity.
Test + Iterate
We fit each light pipe into a test jig or prototype enclosure, pair it with the intended LED, and assess how it performs. If it’s not just right, if the glow isn’t clean, or the part doesn’t fit, we tweak the design and reprint within the same day.

The second prototype of a resin 3D-printed light guide showcases key design improvements: screw hole tabs for secure mounting, a larger raft to minimise warping, and refined geometry for better light distribution with circular LEDs. It’s a clear example of the value of rapid, iterative prototyping in hardware development.

A key moment in the post-processing workflow: a prototype light guide being cleaned in an ultrasonic IPA bath to remove residual resin. This step is crucial for achieving clean, high-performance optical surfaces in functional prototypes.
Why This Matters
In product design, iteration is everything. By controlling our light pipe prototyping process internally, we’re able to:
Speed up development by avoiding outsourcing delays
Experiment more freely without worrying about per-part cost
Ensure fit and function before committing to production tooling
Deliver polished prototypes that match the end-product experience
Every LED, every glow, every click—that’s all part of the user’s first impression. We want it to feel right.
Engineering Lab’s Takeaway
Prototyping optical components used to be a bottleneck. Now, with the GK2 SLA printer and our refined process for using clear resin, it’s just another part of our fast-paced workflow. Whether we’re building light pipes for internal development, investor-ready prototypes, or high-quality visuals for product photography, our in-house workflow lets us test, refine, and deliver polished results with confidence—setting a solid foundation for future manufacturing and funding success.
If you’re designing physical products and wrestling with visibility, alignment, or how to make your status LEDs look just right—we’re here to help.
From clear prints to clear results, Engineering Lab gets light working for you.
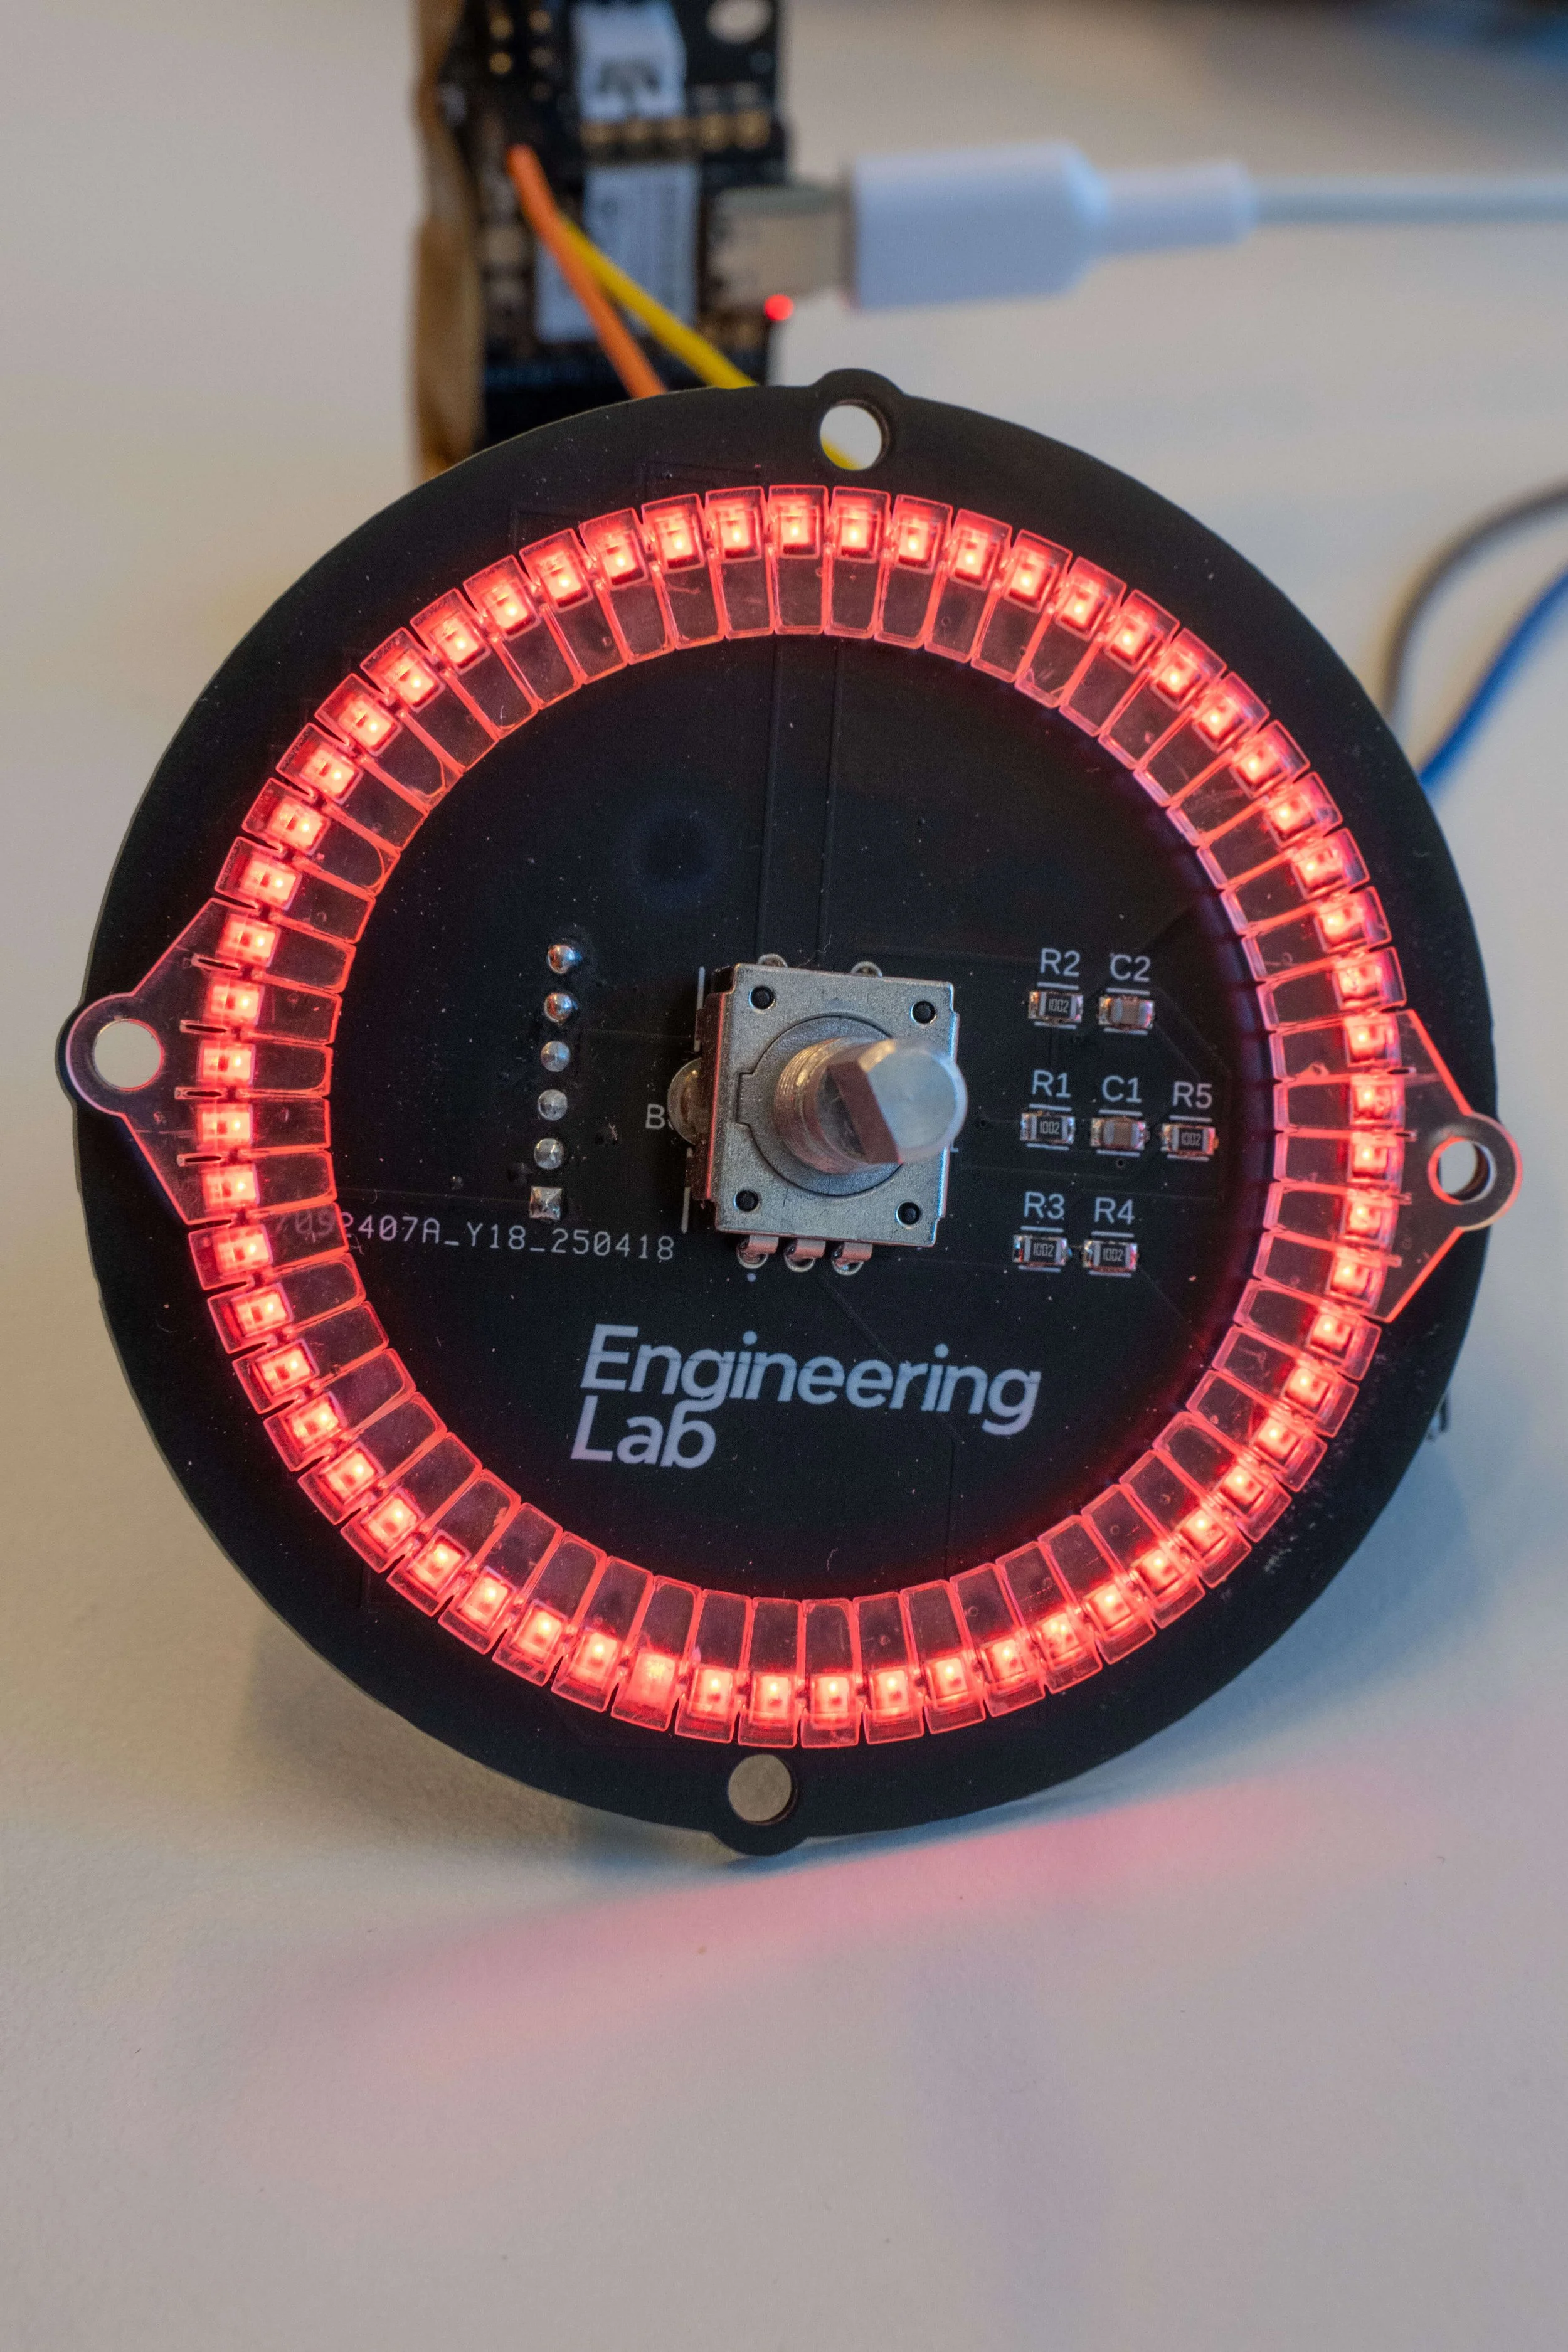
Fully lit red LEDs shine through the resin light guide mounted on a PCB, showcasing the effectiveness of the optical design and component integration. A clean, uniform glow highlights precise alignment and successful light porting.

This image captures a live test of the light guide’s response to user input: as the dial is turned, red LEDs illuminate around the board. It demonstrates both the effectiveness of the optical design and the integration of the interactive control system.